Tree Care
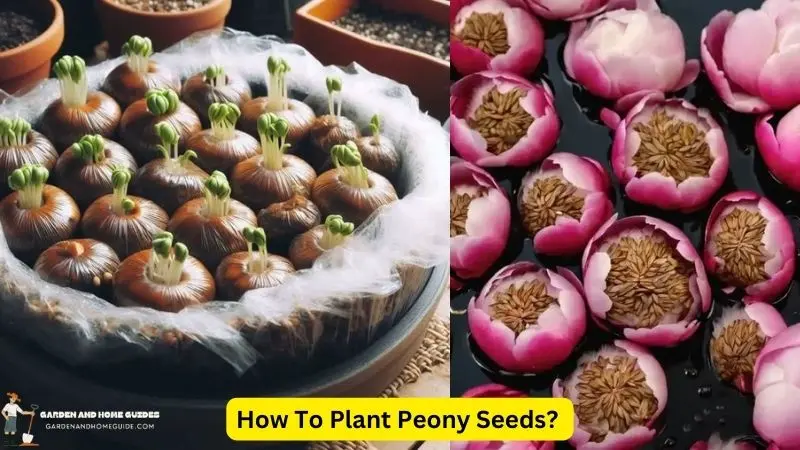
How To Plant Peony Seeds?
Peonies are a cherished addition to any landscape because of their extravagant flowers and enticing smell. While most gardeners opt for established plants or divisions, venturing into the world of peony seeds offers a unique and rewarding experience.
Growing peonies from seed requires patience and dedication, but the journey is richly rewarding, culminating in the joy of witnessing these magnificent flowers emerge from tiny seeds. This essay of gardenandhomeguide.com will guide you through the intricate process of planting peony seeds, revealing the secrets to success and ensuring your efforts blossom into a vibrant display of color and fragrance.
Understanding the Basics: A Glimpse into Peony Seed Biology
Peonies, belonging to the genus Paeonia, are herbaceous perennials known for their large, showy flowers. While they can be propagated through various methods, including division and cuttings, growing them from seed presents a unique challenge. Peony seeds possess a hard, impervious seed coat that prevents water and oxygen from penetrating, hindering germination. This dormancy mechanism, known as hard seed coat dormancy, is a natural defense mechanism ensuring the seeds germinate only under ideal conditions.
How To Plant Peony Seeds?
Preparing the Seeds: Breaking the Dormancy Barrier
The first step in successfully planting peony seeds is to overcome the dormancy barrier. This involves breaking the hard seed coat and allowing water and oxygen to reach the embryo inside. Several methods can be employed to achieve this, each with its own advantages and disadvantages.
- Scarification: This method involves physically abrading the seed coat, creating small cracks or scratches that allow water and oxygen to penetrate. This can be achieved using sandpaper, a file, or even a sharp knife. However, care must be taken not to damage the embryo inside.
- Hot Water Treatment: This method involves immersing the seeds in hot water for a specific duration. The hot water softens the seed coat, making it more permeable. The ideal temperature and duration vary depending on the peony species, but a common approach is to soak the seeds in water heated to 180°F (82°C) for 24 hours.
- Acid Treatment: This method involves soaking the seeds in a weak acid solution, such as sulfuric acid or hydrochloric acid. The acid dissolves the hard seed coat, allowing water and oxygen to penetrate. This method requires careful handling and is best left to experienced gardeners.
- Cold Stratification: This method involves exposing the seeds to cold temperatures for an extended period, mimicking the natural winter conditions required for germination. This can be achieved by placing the seeds in a refrigerator or a cold frame for several months.
Sowing the Seeds: A Careful and Precise Approach
Once the seeds have undergone the appropriate treatment and the dormancy barrier has been broken, they are ready for sowing. The timing of sowing depends on the climate and the specific peony species.
In general, it is best to sow peony seeds in the fall, allowing them to experience a natural winter chill. However, they can also be sown in the spring, provided they have undergone cold stratification.
- Choosing the Right Medium: Peony seeds require a well-draining soil mix that is rich in organic matter. A combination of peat moss, vermiculite, and perlite is ideal.
- Sowing Depth: Peony seeds should be sown about ¼ inch deep.
- Spacing: Allow sufficient space between the seeds, about 6 inches apart.
- Watering: Keep the soil consistently moist but not waterlogged.
- Light: Peony seeds require bright, indirect sunlight.
Nurturing the Seedlings: Patience and Care
Germination of peony seeds can take several weeks or even months. Patience is key during this stage. Once the seedlings emerge, they require consistent care to ensure their healthy growth.
- Thinning: Remove the weaker seedlings once they develop a few genuine leaves, leaving the strongest ones.
- Watering: Make sure the soil stays wet by giving the seedlings regular irrigations.
- Fertilizing: To encourage healthy development, use a balanced fertilizer every few weeks.
- Protection: Keep the seedlings safe from pests and extremely high or low temperatures.
Transplanting the Seedlings: A New Home for Young Peonies
After a year or two, the seedlings will be ready for transplanting to their permanent location. Choose a sunny spot with well-drained soil. Dig a hole twice the width and depth of the root ball.
Use compost or other organic matter to improve the soil. Take great care to remove the seedlings from their pots without causing any damage to the roots. As you plant the seedlings in the holes, make sure the crown is level with the soil or just slightly higher. Thoroughly backfill the holes with dirt and water.
The Rewards of Patience: Witnessing the Bloom
Growing peonies from seed is a testament to patience and dedication. It can take several years for the plants to reach maturity and bloom. But the wait is worth it, as you will witness the transformation of tiny seeds into magnificent flowers. The first blooms may be smaller and less abundant than those of mature plants, but they will gradually increase in size and number as the plants mature.
Conclusion: A Journey of Growth and Beauty
Planting peony seeds is a journey of growth and beauty. It requires patience, dedication, and a willingness to embrace the challenges that come with nurturing these magnificent flowers from their earliest stages.
By understanding the biology of peony seeds, employing the appropriate techniques for breaking dormancy, and providing consistent care, you can successfully cultivate these prized plants from seed. The rewards are immeasurable, offering a sense of accomplishment and the joy of witnessing the transformation of tiny seeds into a vibrant display of color and fragrance. As your peony seedlings mature and bloom, they will become a testament to your dedication and a source of beauty in your garden for years to come.


